Resource Import/Export#
Currently, all data import and export operations happen through the Arches command line interface.
Importing Data#
Arches provides methods for importing data in a few different formats. Generally, you are placing the values you want to import into a structured file. The form that each value takes, depends on the data type of its target node.
Be aware that the graph-based structure of Resource Models in Arches means that your data must be carefully prepared before import, to ensure that branches, groupings, and cardinality is maintained. The method for doing this is determined by which file format you decide to use. Additionally, the data type of the target node for each value in your file will dictate that value’s format.
Datatype Formats#
Nodes in your target resource model will have a specific datatype defined for each one (see Core Arches Datatypes), and it is very important that you format your input data accordingly. Below is a list of all core datatypes and how they should look in your import files.
string#
Strings can be simple text or include HTML tags (whether or not HTML is rendered depends on the card and widget configuration):
Smith Cottage
<p>This is a rich text description that contains <strong>HTML</strong> tags.</p>
In CSV, strings must be quoted only if they contain a comma:
"Behold, the Forevertron."
number#
Integers or floats; never use quotes or comma separators:
42
-465
17322.464453
date#
Format must be YYYY-MM-DD, no quotes:
1305-10-31
1986-02-02
edtf#
Must be a valid Extended Date Time Format string:
"2010-10"
"-y10000"
Arches supports level 2 of the EDTF specification. However, because of a bug in the edtf package used by Arches, an error will be thrown for strings like:
"../1924"
As a workaround, you can use a string like:
"[../1924]"
geojson-feature-collection#
In CSV, use the Well-Known Text (WKT) format:
POINT (-82.53973 29.658642)
MULTIPOLYGON (((-81.435 26.130, -81.425 26.124, -81.415 26.137, -81.435 26.130)))
In JSON, include the entire definition of a GeoJSON Feature Collection (the properties and id attributes can be empty). Use geojson.io and geojsonlint.com for testing:
"features": [
        {
            "geometry": {
                "coordinates": [
                    -82.53973,
                    29.658642
                ],
                "type": "Point"
            },
            "id": "",
            "properties": {},
            "type": "Feature"
        }
    ],
    "type": "FeatureCollection"
}
concept#
In CSV/SHP, if the values in your concept collection are unique you can use the label (prefLabel) for a concept. If not, you will get an error during import and you must use UUIDs instead of labels (if this happens, see Concepts File below):
Slate
2995daea-d6d3-11e8-9eb1-0242ac150004
If a prefLabel has a comma in it, it must be triple-quoted:
"""Shingles, original"""
In JSON, you must use a concept’s UUID:
2995daea-d6d3-11e8-9eb1-0242ac150004
concept-list#
In CSV/SHP, must be a single-quoted list of prefLabels (or UUIDs if necessary):
Brick
"Slate,Thatch"
"651c59b0-ff30-11e8-9975-94659cf754d0,cdcc206d-f80d-4cc3-8685-40e8949158f8"
If a prefLabel contains a comma, then that prefLabel must be double-quoted:
"Slate,""Shingles, original"",Thatch"
In JSON, a list of UUIDs must be used. If only one value is present, it must still be placed within brackets:
["d11630fa-c5a4-49b8-832c-5976e0044bca"]
["651c59b0-ff30-11e8-9975-94659cf754d0","cdcc206d-f80d-4cc3-8685-40e8949158f8"]
domain-value#
A string that matches a valid domain value for this node, single-quoted if it contains a comma:
Yes
"Started, in progress"
domain-value-list#
A single-quoted list of strings that match valid domain values for this node. Follow quoting guidelines for concept-list if any values contain commas:
"Red,Blue,Green"
file-list#
In CSV/SHP, simply use the file name, or a single-quoted list of file names:
BuildingPicture.jpg
See the note below about where to prepopulate this file on your server, if you are not uploading it through the package load operation.
In JSON, you must include a more robust definition of the file that looks like this (and remember, this must be a list, even if you only have one file per node):
[
    {
        "accepted": true,
        "file_id": "6304033b-2f42-4bfd-86a5-5e2a941d95f1",
        "name": "BuildingPicture.jpg",
        "renderer": "5e05aa2e-5db0-4922-8938-b4d2b7919733",
        "status": "uploaded",
        "type": "image/jpeg",
        "url": "/files/6304033b-2f42-4bfd-86a5-5e2a941d95f1"
    }
]
You should be able to generate this content by doing the following:
Pregenerate a new UUID for each file
Place this UUID in the
file_idproperty, and also use it in theurlproperty as shown above.Select a renderer from
settings.RENDERERS(see settings.py) and use its id for therendererproperty. At the time of this writing, use5e05aa2e-5db0-4922-8938-b4d2b7919733for images (jpg, png, etc.) and09dec059-1ee8-4fbd-85dd-c0ab0428aa94for PDFs.Set the
typeas appropriate–image/jpeg,image/png,application/pdf, etc.
Note
The file(s) should already exist in the uploadedfiles/ directory prior to loading the resource, but technically can be added later as well. This directory should be located within your MEDIA_ROOT location. For example, by default, Arches sets MEDIA_ROOT = os.path.join(ROOT_DIR). This means you should find (or create if it doesn’t exist) my_project/uploadedfiles, alongside manage.py.
resource-instance#
In CSV/SHP, the format consists of a version of the JSON data structure:
"[{'resourceId': '3d5a80df-4bcb-4ea0-bbaf-327ea0f41b31', 'ontologyProperty': 'http://www.cidoc-crm.org/cidoc-crm/L54i_is_same-as', 'resourceXresourceId': '', 'inverseOntologyProperty': 'http://www.cidoc-crm.org/cidoc-crm/L54i_is_same-as'}]"
Where:
resourceId(required) - the target resource-instance ResourceIDontologyProperty(can be left blank) - the URL of the ontology property that defines the relationship to the target resource-instanceresourceXresourceId(can be left blank) - the system will assign a UUID for this relationshipinverseOntologyProperty(can be left blank) - the URL of the ontology property that defines the inverse of the relationship referenced underontologyProperty
In JSON, the format is as follows:
{
    "inverseOntologyProperty": "",
    "ontologyProperty": "",
    "resourceId": "b2f2f91f-2881-11ed-ad39-e746f226a47a",
    "resourceXresourceId": ""
}
resource-instance-list#
In CSV/SHP, same as above, except repeating each resource-instance within the square brackets (i.e. “[{first resource-instance},{second resource-instance}]” ):
"[{'resourceId': '3d5a80df-4bcb-4ea0-bbaf-327ea0f41b31', 'ontologyProperty': 'http://www.cidoc-crm.org/cidoc-crm/L54i_is_same-as', 'resourceXresourceId': '', 'inverseOntologyProperty': 'http://www.cidoc-crm.org/cidoc-crm/L54i_is_same-as'},{'resourceId': 'ce1efa88-d68e-44e3-95fa-3abb2cb433e9', 'ontologyProperty': 'http://www.cidoc-crm.org/cidoc-crm/L54i_is_same-as', 'resourceXresourceId': '', 'inverseOntologyProperty': 'http://www.cidoc-crm.org/cidoc-crm/L54i_is_same-as'}]"
In JSON:
[
    {
        "inverseOntologyProperty": "",
        "ontologyProperty": "",
        "resourceId": "b2f2f91f-2881-11ed-ad39-e746f226a47a",
        "resourceXresourceId": ""
    },
    {
        "inverseOntologyProperty": "",
        "ontologyProperty": "",
        "resourceId": "b94455a2-a8ed-4d3d-919a-ae91493d6606",
        "resourceXresourceId": ""
    }
]
url#
Same as string formatting. Validation will run to ensure the value is a proper URL:
https://www.nps.gov/subjects/nationalregister/index.htm
CSV Import#
One method of bulk loading data into Arches is to create a CSV (comma separated values) file. We recommend using MS Excel or Open Office for this task. More advanced users will likely find a custom scripting effort to be worthwhile.
Note
Your CSV should be encoded into UTF-8. These steps will help you if you are using MS Excel.
The workflow for creating a CSV should be something like this:
Identify which Resource Model you are loading data into
Download the mapping file and concepts file for that resource model
Modify the mapping file to reference your CSV
Populate the CSV with your data
Import the CSV using the Import business data command.
CSV File Requirements#
Each row in the CSV can contain the attribute values of one and only one resource.
The first column in the CSV must be named ResourceID. ResourceID is a user-generated unique ID for each individual resource. If ResourceID is a valid UUID, Arches will adopt it internally as the new resource’s identifier. If ResourceID is not a valid UUID Arches will create a new UUID and use that as the resource’s identifier. Subsequent columns can have any name.
ResourceIDs must be unique among all resources imported, not just within each csv, for this reason we suggest using UUIDs.
ResourceID |
attribute 1 |
attribute 2 |
attribute 3 |
|---|---|---|---|
1 |
attr. 1 value |
attr. 2 value |
attr. 3 value |
2 |
attr. 1 value |
attr. 2 value |
attr. 3 value |
3 |
attr. 1 value |
attr. 2 value |
attr. 3 value |
Simple CSV with three resources, each with three different attributes.
Or, in a raw format (if you open the file in a text editor), the CSV should look like this:
Resource ID,attribute 1,attribute 2,attribute 3
1,attr. 1 value,attr. 2 value,attr. 3 value
2,attr. 1 value,attr. 2 value,attr. 3 value
3,attr. 1 value,attr. 2 value,attr. 3 value
Multiple lines may be used to add multiple attributes to a single resource. You must make sure these lines are contiguous, and every line must have a ResourceID. Other cells are optional.
ResourceID |
attribute 1 |
attribute 2 |
attribute 3 |
|---|---|---|---|
1 |
attr. 1 value |
attr. 2 value |
attr. 3 value |
2 |
attr. 1 value |
attr. 2 value |
attr. 3 value |
2 |
attr. 2 additional value |
||
3 |
attr. 1 value |
attr. 2 value |
attr. 3 value |
CSV with three resources, one of which has two values for attribute 2.
Depending on your Resource Model’s graph structure, some attributes will be handled as “groups”. For example, Name and Name Type attributes would be a group. Attributes that are grouped must be on the same row. However, a single row can have many different groups of attributes in it, but there may be only one of each group type per row. (e.g. you cannot have two names and two name types in one row).
ResourceID |
name |
name_type |
description |
|---|---|---|---|
1 |
Yucca House |
Primary |
“this house, built in…” |
2 |
Big House |
Primary |
originally a small cabin |
2 |
Old Main Building |
Historic |
|
3 |
Writer’s Cabin |
Primary |
housed resident authors |
CSV with three resources, one of which has two groups of name and name_type attributes. Note that “Primary” and “Historic” are the prefLabels for two different concepts in the RDM.
You must have values for any required nodes in your resource models.
Note
If you are using MS Excel to create your CSV files, double-quotes will automatically be added to any cell value that contains a comma.
Mapping File#
All CSV files must be accompanied by a mapping file. This is a JSON-structured file that indicates which node in a Resource Model’s graph each column in the CSV file should map to. The mapping file should contain the source column name populated in the file_field_name property for all nodes in a graph the user wishes to map to. The mapping file should be named exactly the same as the CSV file but with the extension ‘.mapping’, and should be in the same directory as the CSV.
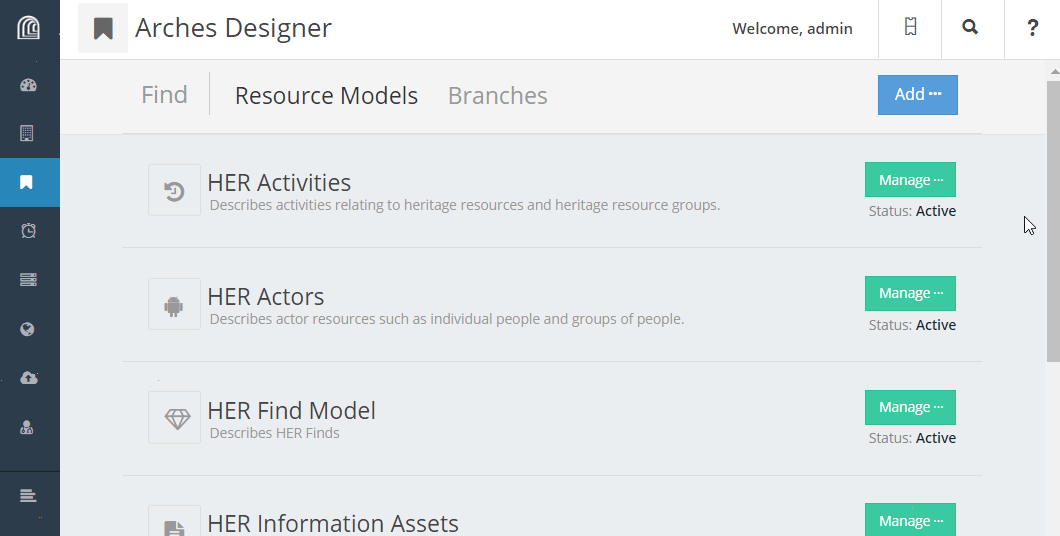
To create a mapping file for a Resource Model in your database, go to the Arches Designer landing page. Find the Resource Model into which you plan to load resources, and choose Export Mapping File from the Manage menu.
Unzip the download, and you’ll find a .mapping file as well as a _concepts.json file (see Concepts File). The contents of the mapping file will look something like this:
{
    "resource_model_id": "bbc5cee8-fa16-11e6-9e3e-026d961c88e6",
    "resource_model_name": "HER Buildings",
    "nodes": [
        {
            "arches_nodeid": "bbc5cf1f-fa16-11e6-9e3e-026d961c88e6",
            "arches_node_name": "Name",
            "file_field_name": "",
            "data_type": "concept",
            "concept_export_value": "label",
            "export": false
        },
        {
            "arches_nodeid": "d4896e3b-fa30-11e6-9e3e-026d961c88e6",
            "arches_node_name": "Name Type",
            "file_field_name": "",
            "data_type": "concept",
            "concept_export_value": "label",
            "export": false
        },
        ...
    ]
}
The mapping file contains cursory information about the resource model (name and resource model id) and a listing of the nodes that compose that resource model. Each node contains attributes to help you import your business data (not all attributes are used on import, some are there simply to assist you). The concept_export_value attribute is only present for nodes with datatypes of concept, concept-list, domain, and domain-list - this attribute is not used for import. It is recommended that you not delete any attributes from the mapping file. If you do not wish to map to a specfic node simply set the file_field_name attribute to "".
You will now need to enter the column name from your CSV into the file_field_name in appropriate node in the mapping file. For example, if your CSV has a column named “activity_type” and you want the values in this column to populate “Activity Type” nodes in Arches, you would add that name to the mapping file like so:
{
    ...
        {
            "arches_nodeid": "bbc5cf1f-fa16-11e6-9e3e-026d961c88e6",
            "arches_node_name": "Activity Type",
            "file_field_name": "activity_type", <-- place column name here
            "data_type": "concept",
            "concept_export_value": "label",
            "export": false
        },
   ...
}
To map more than one column to a single node, simply copy and paste that node within the mapping file.
Concepts File#
When populating concept nodes from a CSV you should generally use the prefLabel for that concept. However, in rare instances there may be two or more concepts in your collection that have identical prefLabels (this is allowed in Arches). In this case you will need to replace the prefLabel in your CSV with the UUID for the Value that represents that prefLabel.
To aid with the process, a “concepts file” is created every time you download a mapping file, which lists the valueids and corresponding labels for all of the concepts in all of the concept collections associated with any of the Resource Model’s nodes. For example:
"Name Type": {
    "ecb20ae9-a457-4011-83bf-1c936e2d6b6a": "Historic",
    "81dd62d2-6701-4195-b74b-8057456bba4b": "Primary"
},
You would then need to use 81dd62d2-6701-4195-b74b-8057456bba4b instead of Primary in your CSV.
Shapefile Import#
python manage.py packages -o import_business_data -s 'path_to_shapefile' -c 'path_to_mapping_file' [-ow {'overwrite'|'append'}]
Uploading a shapefile to Arches is very similar to uploading a CSV file with a few exceptions. The same rules apply to rich text, concept data, grouped data, and contiguousness. And, like CSV import, shapefile import requires a mapping file. Note that in this mapping file, the node you wish to map the geometry to must have a file_field_name value of ‘geom’.
Other Requirements:
The shapefile must contain a field with a unique identifier for each resource named ‘ResourceID’.
The shapefile must be in WGS 84 (EPSG:4326) decimal degrees.
The shapefile must consist of at least a .shp, .dbf, .shx, and .prj file. It may be zipped or unzipped.
Dates in a shapefile can be in ESRI Shapefile date format, Arches will convert them to the appropriate date format. They can also be strings stored in YYYY-MM-DD format.
Note
More complex geometries may encounter a mapping_parser_exception error. This error occurs when a geometry is not valid in elasticsearch. To resolve this, first make sure your geometry is valid using ArcMap, QGIS, or PostGIS. Next, you can modify the precision of your geometry to 5 decimals or you can simplify your geometry using the QGIS simplify geometry geoprocessing tool, or the PostGIS st_snaptogrid function.
JSON Import#
python manage.py packages -o import_business_data -s 'path_to_json' [-ow {'overwrite'|'append'}]
JSON import of business data is primarily intended for transferring business data between arches instances. Because of this it’s not especially user-friendly to create or interpret the JSON data format, but doing so is not impossible.
First, there are at least two ways you can familiarize yourself with the format. The system settings in an Arches package is stored in this json format, you can open one of those up and take a look. Perhaps a better way in your case is to create some business data via the ui in your instance of arches and export it to the json format using the business data export command defined here Export Commands. This can act as a template json for data creation. For the rest of this section it may be helpful to have one of these files open to make it easier to follow along.
General structure of the entire file:
{
    "business_data": {
        "resources": [
            {
                "resourceinstance": {. . .},
                "tiles": [. . .],
            }
        ]
    }
}
The json format is primarily a representation of the tiles table in the arches postgres database with some information about the resource instance(s) included. Within the business_data object of the json are two objects, the tiles object and the resourceinstance object. Let’s start with the resource instance object.
Structure of the resourceinstance object:
{
    "graph_id": uuid,
    "resourceinstanceid": uuid,
    "legacyid": uuid or text
}
graph_id- the id of the resource model for which this data was createdresourceinstanceid- the unique identifier of this resource instance within Arches (this will need to be unique for every resource in Arches)legacyid- an identifier that was used for this resource before its inclusion in Arches. This can be the same as the resourceinstanceid (this is the case when you provide a UUID to the ResourceID column in a CSV) or it can be another id. Either way it has to be unique among every resource in Arches.
The tiles object is a list of tiles that compose a resource instance. The tiles object is a bit more complicated than the resourceinstance object, and the structure can vary depending on the cardinality of your nodes. The following cardinality examples will be covered below:
But first a description of the general structure of a single tile:
{
    "tileid": "<uuid>",
    "resourceinstance_id": "<uuid>",
    "nodegroup_id": "<uuid>",
    "sortorder": 0,
    "parenttile_id": "<uuid>" or null,
    "data": {. . .}
}
tileid- unique identifier of the tile this is the primary key in the tiles table and must be a unique uuidresourceinstance_id- the uuid corresponding to the instance this tile belongs to (this should be the same as the resourceinstance_id from the resourceinstance object.nodegroup_id- the node group for which the nodes within the data array participatesortorder- the sort order of this data in the form/report relative to other tiles (only applicable if cardinality is n)parenttile_id- unique identifier of the parenttile of this tile (will be null if this is a parent tile or the tile has no parent)data- json structure of a node group including the nodeid and data populating that node. For example:{ "data": { "<uuid for building name node>": "Smith Cottage" } }
The tile object is tied to a resource model in two ways: 1) through the nodegroup_id 2) in the data object where nodeids are used as keys for the business data itself.
Now for a detailed look at the actual contents of tiles. Note that below we are using simplified values for tileid, like "A" and "B", to clearly illustrate parent/child relationships. In reality these must be valid UUIDs.
1 card#
1: There is one and only one instance of this nodegroup/card in a resource:
[
    {
        "tileid": "A",
        "resourceinstance_id": "<uuid from resourceinstance.resourceinstanceid>",
        "nodegroup_id": "<uuid from resource model>",
        "sortorder": 0,
        "parenttile_id": null,
        "data": {
            "nodeid": "some data",
            "nodeid": "some other data"
        }
    }
]
This structure represents a tile for a nodegroup (consisting of two nodes) with no parents collecting data with a cardinality of 1.
n cards#
n: There are multiple instances of this nodegroup/card in a resource:
[
    {
        "tileid": "A",
        "resourceinstance_id": "<uuid from resourceinstance.resourceinstanceid">,
        "nodegroup_id": "<uuid from resource model">,
        "sortorder": 0,
        "parenttile_id": null,
        "data": {
            "nodeid": "some data",
            "nodeid": "some other data"
        }
    },
        {
        "tileid": "B",
        "resourceinstance_id": "<uuid from resourceinstance.resourceinstanceid>",
        "nodegroup_id": "<uuid from resource model>",
        "sortorder": 0,
        "parenttile_id": null,
        "data": {
            "nodeid": "more data",
            "nodeid": "more other data"
        }
    }
]
1 parent card with 1 child card#
1-1: One and only one parent nodegroup/card contains one and only one child nodegroup/card:
[
    {
        "tileid": "A",
        "resourceinstance_id": "<uuid from resourceinstance.resourceinstanceid>",
        "nodegroup_id": "<uuid from resource model>",
        "sortorder": 0,
        "parenttile_id": null,
        "data": {}
    },
    {
        "tileid": "X",
        "resourceinstance_id": "<uuid from resourceinstance.resourceinstanceid>",
        "nodegroup_id": "<uuid from resource model>",
        "sortorder": 0,
        "parenttile_id": "A",
        "data": {
            "nodeid": "data",
            "nodeid": "other data"
        }
    }
]
1 parent card with n child cards#
1-n: One and only one parent nodegroup/card containing multiple instances of child nodegroups/cards:
[
    {
        "tileid": "A",
        "resourceinstance_id": "<uuid from resourceinstance.resourceinstanceid>",
        "nodegroup_id": "<uuid from resource model>",
        "sortorder": 0,
        "parenttile_id": null,
        "data": {}
    },
    {
        "tileid": "X",
        "resourceinstance_id": "<uuid from resourceinstance.resourceinstanceid>",
        "nodegroup_id": "<uuid from resource model>",
        "sortorder": 0,
        "parenttile_id": "A",
        "data": {
            "nodeid": "data",
            "nodeid": "other data"
        }
    },
    {
        "tileid": "Y",
        "resourceinstance_id": "<uuid from resourceinstance.resourceinstanceid>",
        "nodegroup_id": "<uuid from resource model>",
        "sortorder": 0,
        "parenttile_id": "A",
        "data": {
            "nodeid": "more data",
            "nodeid": "more other data"
        }
    }
]
n parent cards with 1 child card#
n-1: Many parent nodegroups/cards each with one child nodegroup/card:
[
    {
        "tileid": "A",
        "resourceinstance_id": "<uuid from resourceinstance.resourceinstanceid>",
        "nodegroup_id": "<uuid from resource model>",
        "sortorder": 0,
        "parenttile_id": null,
        "data": {}
    },
    {
        "tileid": "X",
        "resourceinstance_id": "<uuid from resourceinstance.resourceinstanceid>",
        "nodegroup_id": "<uuid from resource model>",
        "sortorder": 0,
        "parenttile_id": "A",
        "data": {
            "nodeid": "data",
            "nodeid": "other data"
        }
    },
    {
        "tileid": "B",
        "resourceinstance_id": "<uuid from resourceinstance.resourceinstanceid>",
        "nodegroup_id": "<uuid from resource model>",
        "sortorder": 0,
        "parenttile_id": null,
        "data": {}
    },
    {
        "tileid": "Y",
        "resourceinstance_id": "<uuid from resourceinstance.resourceinstanceid>",
        "nodegroup_id": "<uuid from resource model>",
        "sortorder": 0,
        "parenttile_id": "B",
        "data": {
            "nodeid": "more data",
            "nodeid": "more other data"
        }
    }
]
n parent cards with n child cards#
n-n: Many parent nodegroups/cards containing many child nodegroups/cards:
[
    {
        "tileid": "A",
        "resourceinstance_id": "<uuid from resourceinstance.resourceinstanceid>",
        "nodegroup_id": "<uuid from resource model>",
        "sortorder": 0,
        "parenttile_id": null,
        "data": {}
    },
    {
        "tileid": "X",
        "resourceinstance_id": "<uuid from resourceinstance.resourceinstanceid>",
        "nodegroup_id": "<uuid from resource model>",
        "sortorder": 0,
        "parenttile_id": "A",
        "data": {
            "nodeid": "data",
            "nodeid": "other data"
        }
    },
    {
        "tileid": "B",
        "resourceinstance_id": "<uuid from resourceinstance.resourceinstanceid>",
        "nodegroup_id":  "<uuid from resource model>",
        "sortorder": 0,
        "parenttile_id": null,
        "data": {}
    },
    {
        "tileid": "Y",
        "resourceinstance_id": "<uuid from resourceinstance.resourceinstanceid>",
        "nodegroup_id": "<uuid from resource model>",
        "sortorder": 0,
        "parenttile_id": "B",
        "data": {
            "nodeid": "more data",
            "nodeid": "more other data"
        }
    },
    {
        "tileid": "Z",
        "resourceinstance_id": "<uuid from resourceinstance.resourceinstanceid>",
        "nodegroup_id": "<uuid from resource model>",
        "sortorder": 0,
        "parenttile_id": "B",
        "data": {
            "nodeid": "even more data",
            "nodeid": "even more other data"
        }
    }
]
Importing Resource Relations#
It is possible to batch import Resource Relations (also referred to as “resource-to-resource relationships”). To do so, create a .relations file (a CSV-formatted file with a
.relations extension). The header of the file should be as follows:
resourceinstanceidfrom,resourceinstanceidto,relationshiptype,datestarted,dateended,notes
In each row, resourceinstanceidfrom and resourceinstanceidto must either be an Arches ID (the UUID assigned to a new resource when it is first created) or a Legacy ID (an identifier from a legacy database that was used as a ResourceID in a JSON or CSV import file).
You can find the UUID value for your desired relationshiptype in the concept.json file downloaded with your resource model mapping file.
datestarted, dateended and notes are optional fields. Dates should be formatted YYYY-MM-DD.
Once constructed you can import the .relations file with the following command:
python manage.py packages -o import_business_data_relations -s 'path_to_relations_file'
All the resources referenced in the .relations CSV need to already be in your database. So make sure to run this command after you have imported all the business data referenced in the .relations file.
Note
You can also create relationships between resources using the resource-instance data type. When you are making the graph for a new resource model, you can set one of the nodes to hold a resource instance. This is not the same as creating Resource Relations as described above.
SQL Import#
Arches provides database functions that are meant to assist with the loading, updating and querying of Arches business data via SQL. This strategy is especially useful if you are migrating an existing SQL database into Arches.
SQL import is more flexible and faster than loading via CSV, however it requires some SQL skills to write scripts to interact with these data.
The core functions that arches provides allow for flexible, on-demand creation of view entities that create relational database entities representing Arches graph schema in the form of database views. These database views can be queried using SQL, including INSERT, UPDATE, and DELETE operations.
View creation functions#
__arches_create_nodegroup_view#
Creates a view representing a specific nodegroup in the Arches graph schema. The resultant view can be queried using SQL including INSERT, UPDATE, and DELETE operations. If no view name is provided, then the function will attempt to create a view with the name of the nodegroup’s root node processed to be suitable for a database entity name (for example, spaces replaced with underscores).
Arguments
- group_id:
uuid - the UUID of the nodegroup for which a view will be created.
- view_name:
text (optional) - the name to be used for the view being created, defaults to null
- schema_name:
text (optional) - the name of the schema to which the new view will be added, defaults to ‘public’
- parent_name:
text (optional) - name used for column containing the parent tile id, defaults to ‘parenttileid’
Returns
- returns:
text - message indicating success and name of the view created.
__arches_create_branch_views#
Creates a series of views (using the above __arches_create_nodegroup_view function) representing a specific nodegroup and all of its child nodegroups (recursively) in the Arches graph schema.
Arguments
- group_id:
uuid - the UUID of the nodegroup for which views will be created recursively.
- schema_name:
text (optional) - the name of the schema to which the new views will be added, defaults to ‘public’
Returns
- returns:
text - message indicating success.
__arches_create_resource_model_views#
(Drops if it exists and) creates a schema and a view representing the instances of a specific resource model and series of views (using the above __arches_create_nodegroup_view function) for each of its nodegroups in the Arches graph schema. If no schema name is provided, then the function will attempt to create a schema with the name of resource model processed to be suitable for a database entity name (for example, spaces replaced with underscores).
Arguments
- model_id:
uuid - the UUID of the resource model for which views will be created.
- schema_name:
text (optional) - the name of the schema to which the new views will be added, defaults to null
Returns
- returns:
text - message indicating success and the name of the schema created.
Helper functions#
In addition to the functions that create views, the helper functions are also available to assist in the creation of tile data using the created views.
__arches_get_node_id_for_view_column#
Returns the node id for a given view column. This is useful for subsequently looking up additional information about a column/node in the Arches graph schema, for example, creating a lookup table of concepts for a particular column/node.
Arguments
- schema_name:
text - the name of the schema that contains the view of interest
- view_name:
text - the name of the view of interest
- column_name:
text - the name of the column of interest
Returns
- returns:
uuid - the node id for the column of interest
__arches_get_labels_for_concept_node#
Creates a lookup table of concepts for a particular column/node.
Arguments
- node_id:
uuid - the UUID for a node in the Arches graph schema for which a lookup table of concepts will be created
- language_id:
text (optional) - the language id for which to return a lookup of concept values, defaults to ‘en’
Returns
- returns:
table - the lookup table of concepts for the column/node of interest. the resultant table’s schema is:
- depth:
int - the depth of the concept values in the concept hierarchy
- valueid:
uuid - the value record’s primary key
- value:
text - the value itself (the concept’s label)
- conceptid:
uuid - the concept record’s primary key
Example Usage#
For a hypothetical example, consider a table in your legacy database called buildings with a name and resourceid columns. The following could be used to migrate the rows into new Arches resource instances.
Let’s assume we have a Resource Model called “Architectural Resource”, and it has two nodes, “Name” and “Name Type”, under a single semantic node “Names”.
Use the __arches_create_resource_model_views function (see above) to create a new schema for each active Resource Model.
SELECT __arches_create_resource_model_views(graphid) FROM graphs
    WHERE isactive = true
    AND name != 'Arches System Settings';
In our case, the result will be a new schema called architectural_resource and a table called names (named for the node furthest up the hierarchy in the nodegroup, in this case, a semantic node).
Directly inserting our records into the new Arches view will look something like this:
INSERT INTO architectural_resource.names (
    name,
    name_type,
    resourceinstanceid,
    transactionid
) select
    name,
    "Primary",
    resourceid,
    transactionid
from legacy_db.buildings;
Note
In this case, “Primary” is being given to every name type, because your legacy database did not have more than one name per resource.
Todo
A second table may need to be populated here too, to register the instances themselves.
Warning
This SQL method for inserting records has a known and severe performance issue for Postgres/PostGIS instances installed on Ubuntu, Debian, and Alpine operating systems. On these operating systems, a node-instance data insert of only a few thousand records may result in a database connection time out error (see issue discussion here: archesproject/arches#9049).
This issue is known to impact Arches versions 7.x. A fix for this OS related issue will likely come with Arches version 7.5. If you are using a version of Arches impacted by this issue, you can use the following workaround to vastly (perhaps 50x) improve the performance of the SQL method for inserts. Execute the following SQL BEFORE you run SQL inserts:
create or replace function __arches_tile_view_update() returns trigger as $$
declare
    view_namespace text;
    group_id uuid;
    graph_id uuid;
    parent_id uuid;
    tile_id uuid;
    transaction_id uuid;
    json_data json;
    old_json_data jsonb;
    edit_type text;
begin
    select graphid into graph_id from nodes where nodeid = group_id;
    view_namespace = format('%s.%s', tg_table_schema, tg_table_name);
    select obj_description(view_namespace::regclass, 'pg_class') into group_id;
    if (TG_OP = 'DELETE') then
        select tiledata into old_json_data from tiles where tileid = old.tileid;
        delete from resource_x_resource where tileid = old.tileid;
        delete from public.tiles where tileid = old.tileid;
        insert into bulk_index_queue (resourceinstanceid, createddate)
            values (old.resourceinstanceid, current_timestamp) on conflict do nothing;
        insert into edit_log (
            resourceclassid,
            resourceinstanceid,
            nodegroupid,
            tileinstanceid,
            edittype,
            oldvalue,
            timestamp,
            note,
            transactionid
        ) values (
            graph_id,
            old.resourceinstanceid,
            group_id,
            old.tileid,
            'tile delete',
            old_json_data,
            now(),
            'loaded via SQL backend',
            public.uuid_generate_v1mc()
        );
        return old;
    else
        select __arches_get_json_data_for_view(new, tg_table_schema, tg_table_name) into json_data;
        select __arches_get_parent_id_for_view(new, tg_table_schema, tg_table_name) into parent_id;
        tile_id = new.tileid;
        if (new.transactionid is null) then
            transaction_id = public.uuid_generate_v1mc();
        else
            transaction_id = new.transactionid;
        end if;

        if (TG_OP = 'UPDATE') then
            select tiledata into old_json_data from tiles where tileid = tile_id;
            edit_type = 'tile edit';
            if (transaction_id = old.transactionid) then
                transaction_id = public.uuid_generate_v1mc();
            end if;
            update public.tiles
            set tiledata = json_data,
                nodegroupid = group_id,
                parenttileid = parent_id,
                resourceinstanceid = new.resourceinstanceid
            where tileid = new.tileid;
        elsif (TG_OP = 'INSERT') then
            old_json_data = null;
            edit_type = 'tile create';
            if tile_id is null then
                tile_id = public.uuid_generate_v1mc();
            end if;
            insert into public.tiles(
                tileid,
                tiledata,
                nodegroupid,
                parenttileid,
                resourceinstanceid
            ) values (
                tile_id,
                json_data,
                group_id,
                parent_id,
                new.resourceinstanceid
            );
        end if;
        perform __arches_refresh_tile_resource_relationships(tile_id);
        insert into bulk_index_queue (resourceinstanceid, createddate)
            values (new.resourceinstanceid, current_timestamp) on conflict do nothing;
        insert into edit_log (
            resourceclassid,
            resourceinstanceid,
            nodegroupid,
            tileinstanceid,
            edittype,
            newvalue,
            oldvalue,
            timestamp,
            note,
            transactionid
        ) values (
            graph_id,
            new.resourceinstanceid,
            group_id,
            tile_id,
            edit_type,
            json_data::jsonb,
            old_json_data,
            now(),
            'loaded via SQL backend',
            transaction_id
        );
        return new;
    end if;
    end;
$$ language plpgsql;
As part of this workaround, after you make any bulk updates or inserts to geometries, you’ll need execute the following:
select * from refresh_geojson_geometries();
Exporting Arches Data#
All file-based business exports must happen through the command line interface. The output format can either be JSON (the best way to do a full dump of your Arches database) or CSV (a more curated way to export a specific subset of data). To use Arches data in other systems or export shapefiles, users will have to begin by creating a new resource database view (see below).
Writing Business Data Files#
The output format can either be JSON (the best way to do a full dump of your Arches database) or CSV (a more curated way to export a specific subset of data).
To export JSON, use:
python manage.py packages -o export_business_data -d 'path_to_destination_directory' -f 'json' -g 'resource_model_uuid'
Note that you’ll have to provide the UUID for the Resource Model whose resources you want to export. The easiest way to find this UUID is by looking at the browser url while editing the Resource Model in the Arches Designer UI.
To export CSV, use:
python manage.py packages -o export_business_data -d 'path_to_destination_directory' -f 'csv' -c 'path_to_mapping_file' -g 'resource_model_uuid'
When exporting to CSV, you need to use a Mapping File, which will determine the content of your CSV (which nodes are exported, etc.). Add the --single_file argument to export your grouped data to the same CSV file as the rest of your data.
More about these export commands can be found in Export Commands.
Resource Database Views#
To export to spatial formats such as shapefile, it is necessary to flatten the graph structure of your resources. One way to do this is to create a database view of your resource models. Arches does not do this automatically because there are many ways to design a flattened table depending on your needs.
You can add any number of database views representing a given resource model either for export, or to connect directly to a GIS client such as QGIS or ArcGIS. When writing a view to support shapefile export be sure that your view does not violate any shapefile restrictions. For example, shapefile field names are limited to 10 characters with no special characters and text fields cannot store more than 255 characters.
If you plan to use the arches export command to export your view as a shapefile, you also need to be sure that your view contains 2 fields: geom with the geometry representing your resource instance’s location and geom_type with the postgis geometry type of your geom column.
To write your view, you should start by getting a mapping file for your resource. You can do that by going to the Arches Designer page and then in the manage dropdown of your resource model select Create Mapping File. A zip file will be downloaded and within that file you will find your .mapping file. This file lists all the ids that you will need to design your view.
Below is an example of a simple resource model view. If a resource instance has a tile with geojson saved to it, that tile will be represented as a record in the view along with the corresponding nodeid and tileid. A unique id (gid) is assigned to each row. If a node has more than one geometry, the geometries are combined into a multipart geometry. If a node has more than one geometry of different types, a record will be created for each type. The UUID (ab74af76-fa0e-11e6-9e3e-026d961c88e6) in the last line of this this example is the id of the view’s resource model.
When creating your own view, you will need to replace this UUID with your own resource model’s id. You can find this UUID in your mapping file assigned to the property: resource_model_id.
CREATE OR REPLACE VIEW vw_monuments_simple AS
WITH mv AS (SELECT tileid, resourceinstanceid, nodeid, ST_Union(geom) as geom, ST_GeometryType(geom) AS geom_type
FROM mv_geojson_geoms
GROUP BY tileid, nodeid, resourceinstanceid, ST_GeometryType(geom))
SELECT row_number() OVER () AS gid,
    mv.resourceinstanceid,
    mv.tileid,
    mv.nodeid,
    ST_GeometryType(geom) AS geom_type,
    geom
FROM mv
WHERE (SELECT graphid FROM resource_instances WHERE mv.resourceinstanceid = resourceinstanceid) = 'ab74af76-fa0e-11e6-9e3e-026d961c88e6'
Here is a more complete example which includes columns with tile data:
CREATE OR REPLACE VIEW vw_monuments AS
WITH mv AS (select tileid, resourceinstanceid, nodeid, ST_Union(geom) AS geom, ST_GeometryType(geom) AS geom_type
FROM mv_geojson_geoms
GROUP BY tileid, nodeid, resourceinstanceid, ST_GeometryType(geom))
SELECT
    row_number() over () AS gid,
    mv.resourceinstanceid,
    mv.tileid,
    mv.nodeid,
    ST_GeometryType(geom) AS geom_type,
    name_tile.tiledata ->> '677f303d-09cc-11e7-9aa6-6c4008b05c4c' AS name,
    (SELECT value FROM values WHERE cast(name_tile.tiledata ->> '677f39a8-09cc-11e7-834a-6c4008b05c4c' AS uuid) = valueid ) AS nametype,
    (SELECT value FROM values WHERE cast(component.tiledata ->>'ab74b009-fa0e-11e6-9e3e-026d961c88e6' AS uuid) = valueid ) AS construction_type,
    array_to_string((select array_agg(v.value) FROM unnest(ARRAY(SELECT jsonb_array_elements_text(component.tiledata -> 'ab74afec-fa0e-11e6-9e3e-026d961c88e6'))::uuid[]) item_id LEFT JOIN values v ON v.valueid=item_id), ',') AS const_tech,
    (SELECT value FROM values WHERE cast(record.tiledata ->> '677f2c0f-09cc-11e7-b412-6c4008b05c4c' AS uuid) = valueid ) AS record_type,
    geom
FROM mv
LEFT JOIN tiles name_tile
    ON mv.resourceinstanceid = name_tile.resourceinstanceid
    AND name_tile.tiledata->>'677f39a8-09cc-11e7-834a-6c4008b05c4c'
    != ''
LEFT JOIN tiles component
    ON name_tile.resourceinstanceid = component.resourceinstanceid
    AND component.tiledata->>'ab74afec-fa0e-11e6-9e3e-026d961c88e6'
    != ''
LEFT JOIN tiles record
    ON name_tile.resourceinstanceid = record.resourceinstanceid
    AND record.tiledata->>'677f2c0f-09cc-11e7-b412-6c4008b05c4c'
    != ''
WHERE (SELECT graphid FROM resource_instances WHERE mv.resourceinstanceid = resourceinstanceid) = 'ab74af76-fa0e-11e6-9e3e-026d961c88e6'
You will notice that for each node added as a column in the table, we perform a LEFT JOIN to the tiles table and the nodeid from which we want data. Here is an example joining to the tile containing the record node which has a nodeid of 677f2c0f-09cc-11e7-b412-6c4008b05c4c.
LEFT JOIN tiles record
    ON name_tile.resourceinstanceid = record.resourceinstanceid
    AND record.tiledata->>'677f2c0f-09cc-11e7-b412-6c4008b05c4c'
    != ''
We can then define a field by referencing that tile:
(SELECT value FROM values WHERE cast(record.tiledata ->> '677f2c0f-09cc-11e7-b412-6c4008b05c4c' AS uuid) = valueid ) AS record_type
How you define your fields depends largely on what the node datatype is:
A node with a string datatype:
name_tile.tiledata ->> '677f303d-09cc-11e7-9aa6-6c4008b05c4c' AS name
A node with a concept value id. The following returns the concept values label:
(SELECT value FROM values WHERE cast(name_tile.tiledata ->> '677f39a8-09cc-11e7-834a-6c4008b05c4c' AS uuid) = valueid ) AS nametype
A node with a concept-list. The following returns a concatenated string of concept value labels:
array_to_string((SELECT array_agg(v.value) FROM unnest(ARRAY(SELECT jsonb_array_elements_text(component.tiledata -> 'ab74afec-fa0e-11e6-9e3e-026d961c88e6'))::uuid[]) item_id LEFT JOIN values v ON v.valueid=item_id), ',') AS const_tech